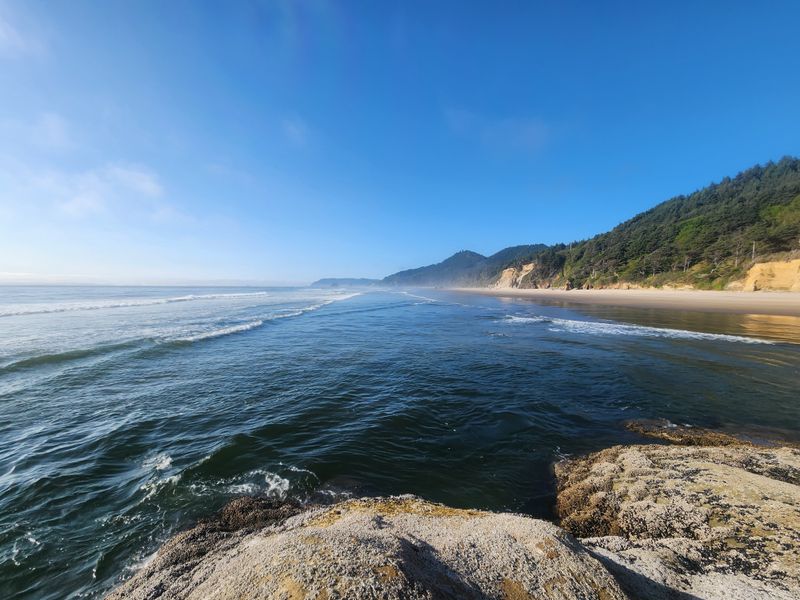
You are here for sea caves, tidal drama, and that cinematic Oregon light, and Hug Point delivers it all with unforgettable character.
The low tide reveals old wagon road traces etched into the headland, and every ripple seems to retell a coastal chapter.
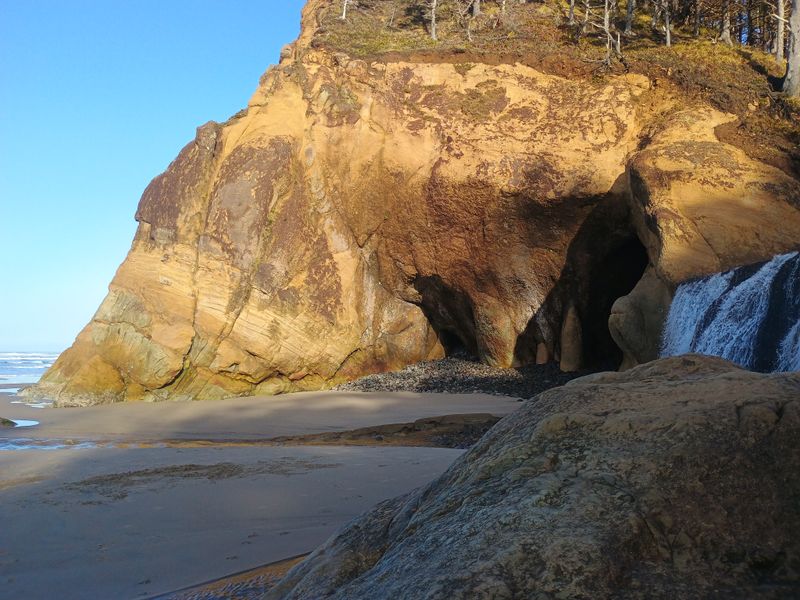
Photographers chase reflections on the glossy sand while the waterfall fans out over basalt like a gauzy curtain.
Plan with care, time your steps to the ocean, and the magic opens right in front of you.
This guide shows the exact moments, angles, and practical moves that bring your images to life.
Timing low tide for safe cave access
Low tide controls everything at Hug Point, and the caves only open their doors when the ocean steps back with a polite pause.
Check NOAA tide predictions for Arch Cape, pair them with sunset or sunrise, and aim for a minus or very low tide for the widest safe window.
Arrive early, watch the sets for a full ten minutes, and commit to leaving the moment the water pattern changes.
Safety sits at the top of your shot list because sneaker waves can wrap around the headland faster than expected.
Keep your exit route in sight, stay off undermined sand shelves, and skip the cave walk if swell height looks punchy.
Footing improves with lightweight boots that grip wet rock, and a compact headlamp helps if clouds dim the cave light.
The best reflections appear when receding water lays a glossy film across the beach that mirrors the cave mouth and sky.
Compose low with a wide lens to stretch the reflections, then tilt slightly until the horizon looks level and steady.
Use a circular polarizer sparingly to tame glare without diminishing the sheen that makes the mirror effect sing.
Shutter speeds around one-fifth to one second blur the incoming lace of foam, and tripods sit firmly on packed sand.
Bracket exposures at the cave entrance to protect highlights while saving detail in shadowed basalt textures.
Back out before the turn of the tide, then shoot the same scene again from higher ground to document scale and context.
Oregon weather shifts quickly, so bring a dry bag and a microfiber cloth for lens spray cleanup between sets.
When in doubt, step away, wait, and rethink your angle because another safe opportunity usually arrives with the next lull.
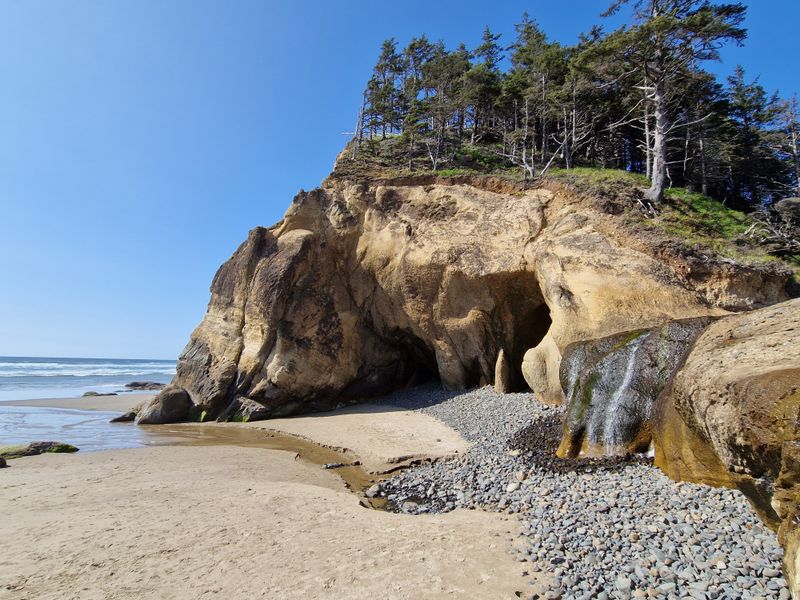
Reading the waterfall and basalt textures
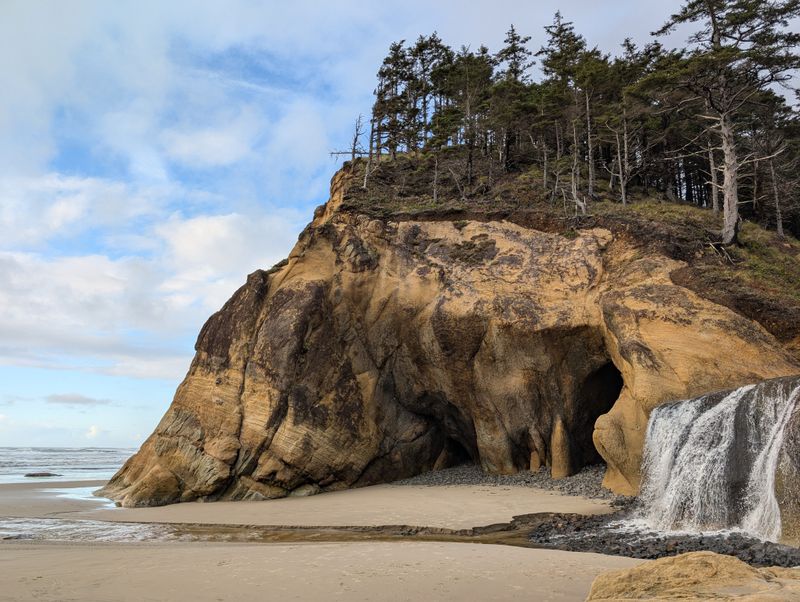
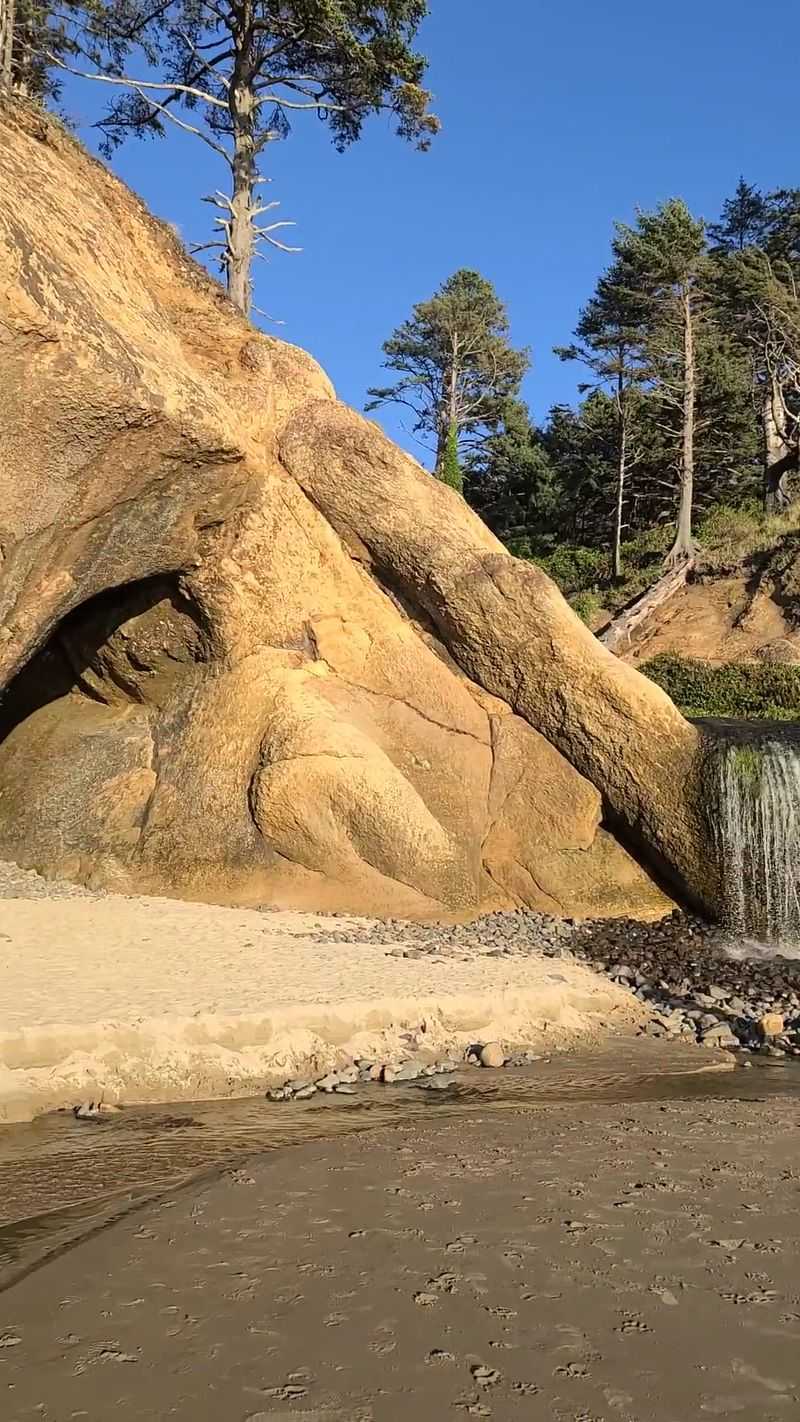
The seasonal waterfall at Hug Point turns into a living softbox when clouds thin and sunlight glows through the spray.
Basalt shelves around the falls carry veining and bubble textures that read beautifully when side-lit at low angles.
Walk the perimeter on firm sand, keep distance from crumbling edges, and avoid climbing the wet rock face for safety.
For creamy water, try half-second to one-second exposures, then switch to faster shutter speeds to freeze shards of spray.
Keep the lens hood handy because mist drifts unpredictably, and wipe between frames to prevent hazy flare patches.
A polarizer teases out algae greens and reduces glare on wet rock while keeping enough shine to show fresh flow.
Compose with the falls on a third and add a foreground ripple line that leads the eye from the beach to the cliff.
Macro details come alive where droplets bead on basalt, so carry a close focus lens and crouch for low-angled light.
Reflections pool in small basins after waves recede, creating layered depth that plays nicely with vertical frames.
Black sand streaks appear after winter storms in Oregon and contrast well with the bright curtain of water.
If light goes flat, switch to monochrome thinking, emphasizing tonal separation between rock, spray, and sky.
Protect wildlife by steering clear of any nesting niches in the cliff face and maintain a quiet, respectful approach.
On breezy days, position with the wind at your back so mist blows away from the front element and camera body.
Step back during surges, then reset composition as the foam fades, because patience often rewards with cleaner foregrounds.
Composing the historic wagon road at the headland
The old wagon road carved into the headland remains one of the most photogenic pieces of Oregon history you can frame.
Its grooves create ready-made leading lines that guide viewers from foreground grit toward the Pacific horizon.
Low tide exposes more of the track and keeps you clear of wraparound waves that can trap people on narrow shelves.
Use a wide lens near the grooves and keep the camera low to exaggerate depth while protecting the sky from blowing out.
Overcast light works well because sandstone and basalt carry subtle color that shines without harsh highlights.
Golden hour also adds warmth, but guard your histogram since bright water can push exposure too far.
Bracketing solves dynamic range, and manual focus helps lock sharpness on textured rock rather than bright foam.
Do not alter or scrape the surface, and avoid placing tripods on fragile edges that show signs of erosion.
Look for small tide pools that reflect the track, then add them as foreground interest in vertical compositions.
A polarizer can deepen color in wet stone while preserving a little shine that proves the road is still tidal.
Include context by featuring the cove and cliff line, or go tight for an abstract that reads like ancient script.
When swells jump, retreat to the sand and wait for a safer lull because the shelf narrows near the bend.
Tell the story in a short series, starting wide, moving mid, then finishing with a detail of tool marks.
This thoughtful pacing gives your set a narrative arc that feels grounded, informative, and respectful.
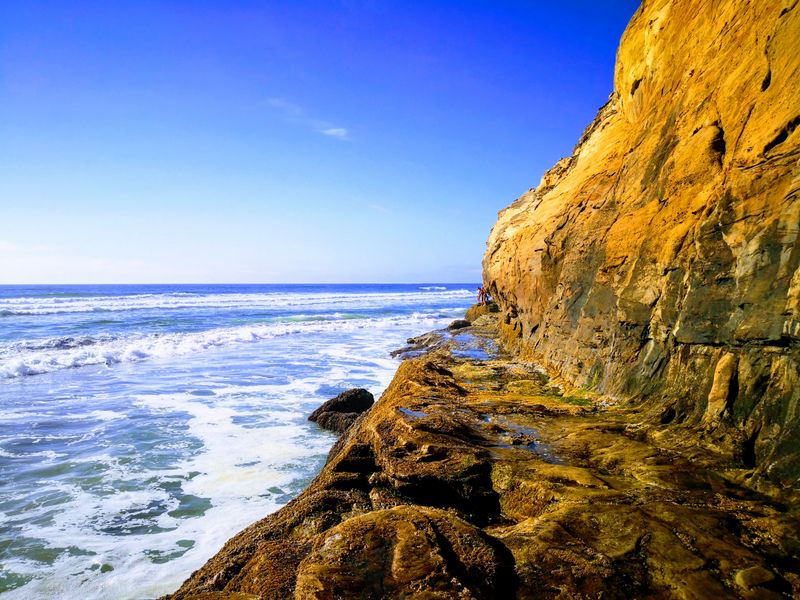
Working with fog, sun breaks, and coastal glare
Hug Point rewards patient watchers who can read the fog bank, because light changes by the minute along this Oregon headland.
When the sun peeks through, beams rake across the cove and carve dimensional layers from cliff to foam line.
Meter for the highlights near the beam, then lift shadows later, since preserving glow matters more than deep detail.
A lens hood and microfiber cloth become essential when glare spikes, and a hat brim helps shield the viewfinder.
Polarizers reduce surface glare, but beware of uneven polarization across wide skies, especially at 16 to 24 millimeters.
Fog likes a gentle backlight, which turns haze into luminous atmosphere that flatters sea cave entrances.
Use manual white balance to control color shifts and keep a consistent mood across a series of frames.
Focus peaking or magnified live view helps ensure sharp edges on basalt when contrast dips in thicker fog.
Bracket exposures anytime the sun touches water, then blend carefully to hold highlight shape without halos.
Step back to higher sand when visibility drops, and do not push around blind corners near the headland.
Soft overcast can be a gift because it gives water a pearly sheen that plays nicely with minimal compositions.
Hold still during long breaths of wind because micro shake ruins the subtle layering that fog scenes depend on.
As fog thins, catch transition shots that compare dense mist with the first clear textures on the cliffs.
Those in-between moments often carry the mood that keeps a gallery cohesive and emotionally grounded.
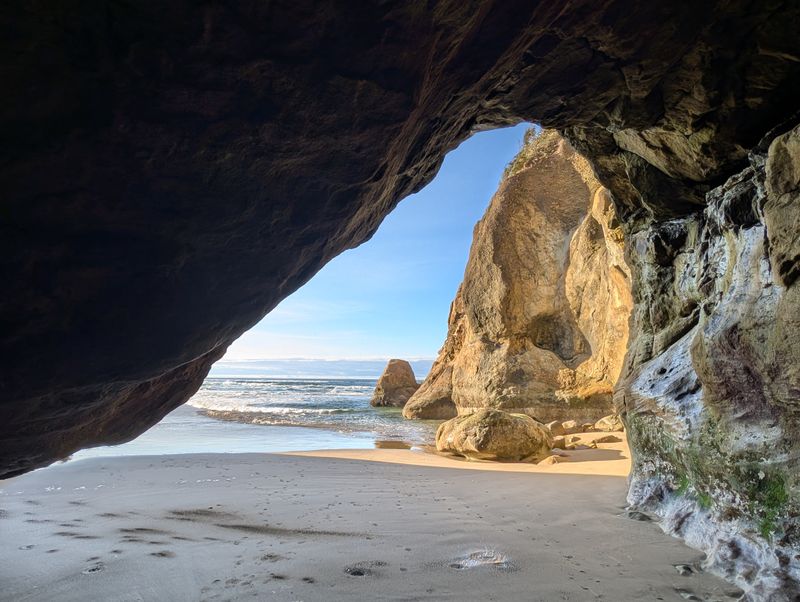
Cave interiors, shadows, and color management
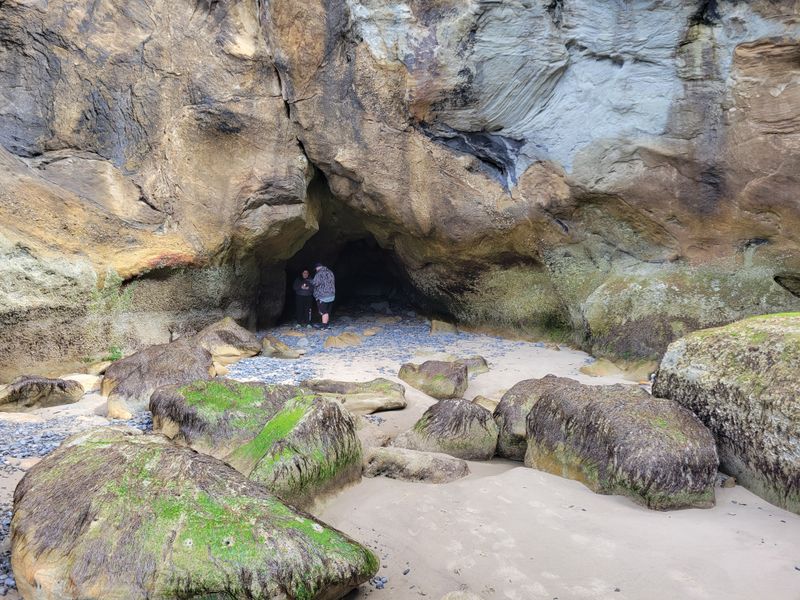
Sea cave interiors ask for careful exposure because the outside beach runs several stops brighter than shadowed basalt.
Set up with the tripod low, frame the arch as a natural vignette, and bracket at two stop intervals for safety.
Manual focus on a mid-distance feature prevents the camera from hunting while surf pulses change brightness.
Keep the shutter higher than you expect if the floor trembles with wave energy, and press gently to avoid shake.
Color shifts toward cool inside the cave, so dial a consistent Kelvin or plan to correct in post for accuracy.
Algae adds green and iron stains add warm streaks, creating a palette that benefits from restrained contrast.
Protect the cave by avoiding flash and by keeping light footprints on damp sand that can crust over delicate patterns.
Watch for dripping roofs and reassess if rocks pop or crack, since stability matters more than any single frame.
Compose with a foreground rippled by retreating water that leads toward the bright mouth and distant surf.
With patience, a wave will flatten the sand to a mirror and lift your composition with a clean reflection.
Check the tide clock and leave buffer time to exit before the return pushes water across the entry.
Oregon conditions vary quickly, so plan flexible sequences rather than rigid shot lists that ignore safety cues.
Use a cloth over the camera between sets to reduce spray spots, then review carefully at high magnification.
A tidy workflow helps you adapt quickly as light changes, keeping images consistent and richly detailed.
Wide landscapes and telephoto details in one session
A good coastal session blends grand scenes with tight details, and Hug Point makes that switch easy with short walking distances.
Start wide from the central cove to record the full cliff arc, then pivot to the headland grooves for structural lines.
A 16 to 35 millimeter lens covers sweeping reflections, and a 70 to 200 or 100 to 400 fetches abstract rock patterns.
Telephoto shots benefit from higher shutter speeds because shimmering air over wet sand can soften edges.
Look for repeating rock polygons or barnacle clusters that suggest rhythm and keep the eye moving through the frame.
When clouds thin, the telephoto compresses glow behind sea spray into layers that feel cinematic yet grounded.
Stitch panoramas on a steady tripod and overlap generously, then correct perspective so the horizon stays true.
Switch to verticals for clean leading lines along the receding tide, which also helps for magazine-style layouts.
Noise stays low if you expose to the right without clipping, then tame the highlights during careful processing.
Carry a microfiber pouch and a spare battery in a sealed pocket because salt air chews through charge faster.
Oregon breezes can shake a lighter tripod, so lower the center column and hang a bag to stabilize the rig.
A deliberate pace saves energy, letting you shoot with clarity rather than rushing between every vantage point.
Close your loop by returning to your first composition and tracking how light altered mood across the session.
The resulting set feels cohesive and tells a richer story than any single hero shot could manage alone.
Footprints, reflections, and minimal compositions
Hug Point rewards a minimalist eye, especially after a receding wave leaves a flawless mirror across the sand.
Reflections stretch elegantly when you crouch low and tilt slightly to balance sky and beach in near equal halves.
Footprints can either spoil the mirror or become a storytelling element that traces a subtle path to the caves.
Arrive early or wait for new water to smooth the canvas, then step gently around the edge of your frame.
Short focal lengths exaggerate space while a small aperture preserves crispness from foreground grains to distant cliffs.
Monochrome treatments thrive on strong geometry and tone, giving your gallery a timeless Oregon coastal feel.
Keep the frame clean by scanning corners before you press the shutter so stray kelp does not pull attention.
Use a two-second timer on the tripod to remove fingertip shake that can blur the most delicate edges.
When wind calms, try longer exposures to polish the water surface, but keep an eye on bright highlights.
After each sequence, step out and check the scene for any trace you left that might distract from the next shot.
Rain creates a matte sheen that pares down reflections and can push you toward intimate studies of texture.
If color feels flat, lean on shape and layering, letting the headland silhouette anchor the composition.
Light fog softens the horizon line and can turn a simple arrangement of lines into something meditative.
Give yourself space to breathe between frames because minimal scenes often click when you shoot with patience.
Golden hour to blue hour transitions
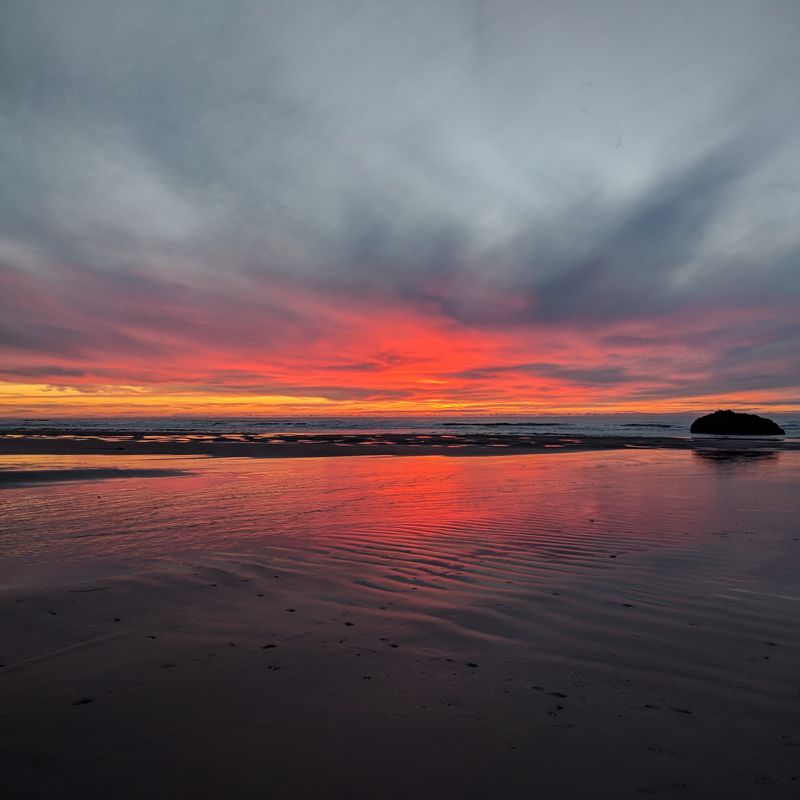
The evening shift from golden hour to blue hour at Hug Point stacks color changes that look gorgeous on polished sand.
Warm light catches sea spray first, then the cliff face, and finally the cave lips as the sun dips toward the horizon.
As shadows lengthen, watch the waterfall turn from amber to silver while reflections swap saturation for smooth tone.
Arrive with time to scout your exit route, then set reference compositions you can revisit as the sky cools down.
Use graduated filters sparingly or bracket exposures to protect sky color and keep the beach properly grounded.
When the sun drops, switch white balance gradually to hold a natural twilight gradient that feels authentic.
Longer shutter speeds sketch gentle water trails that add motion without blurring the headland contours.
Keep ISO low and watch for tripod shift in soft sand, pressing your legs deeper for steadier footing.
Blue hour invites vertical frames that highlight the luminous strip of sea where small waves recede.
Reflections grow darker and more subtle, so expose carefully and avoid crushing the midtones into mud.
Oregon evenings cool fast, and extra layers help you focus on composition rather than the chill.
Pack a headlamp for the walk out, but aim it down to protect night vision and respect other visitors.
Take a final high dynamic range set just before nautical twilight to capture the cliff line in silhouette.
Leave before the tide returns to the base of the headland, keeping the night calm and uneventful.
Practical logistics, parking, and nearby services
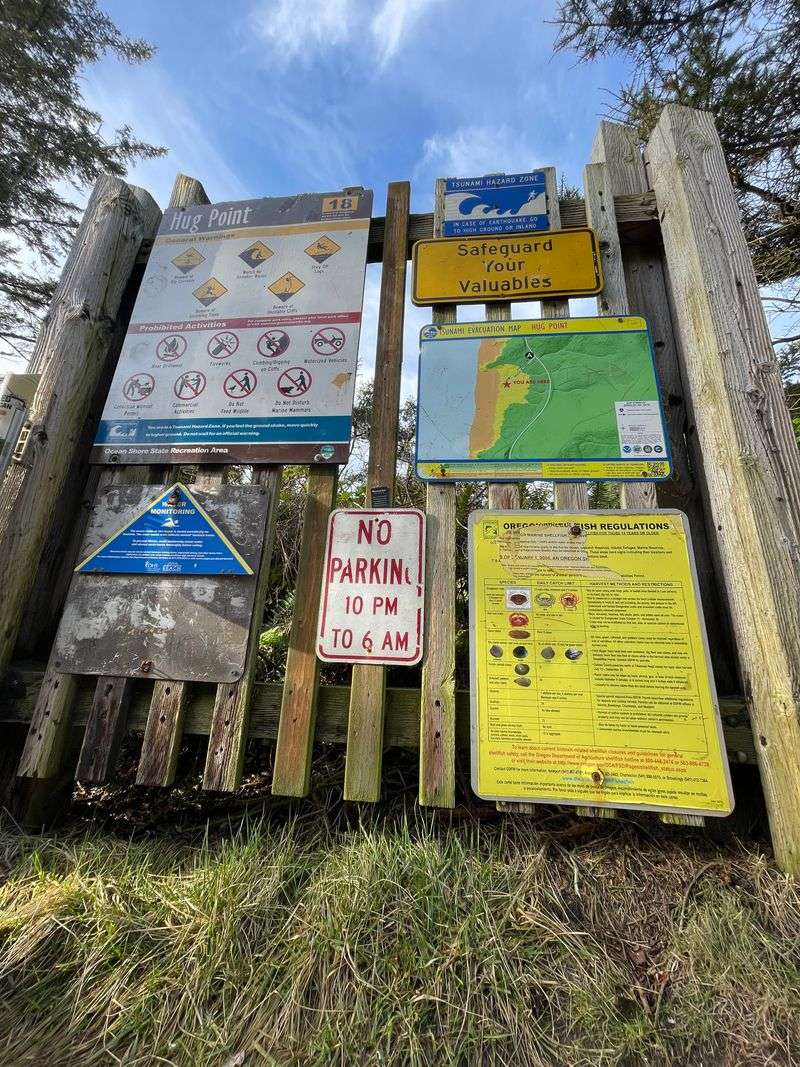
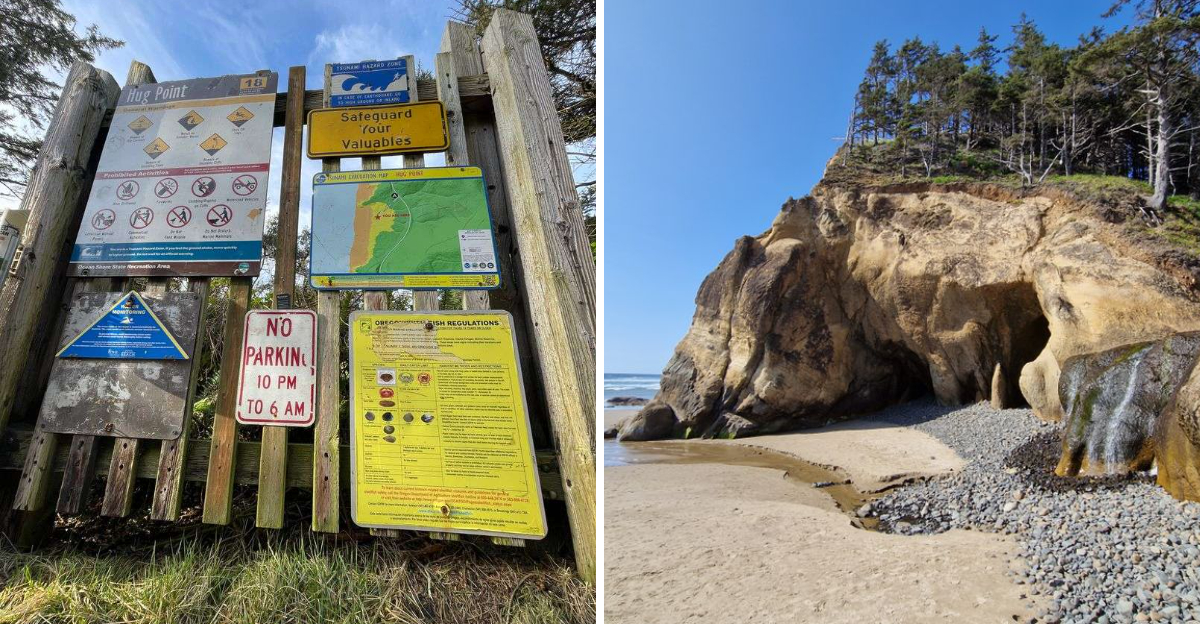
Hug Point State Recreation Site sits just south of Cannon Beach with a small lot that fills quickly on clear days.
The official address on many maps reads Beach Access Rd, Arch Cape, OR 97102, which leads directly to the main access.
Arrive early, secure a spot, and keep valuables out of sight while you focus on weather, light, and tide timing.
Restrooms are available near the parking area, and informational signs outline basic coastal safety considerations.
Cell service varies, so download offline maps and tide charts before the drive along this Oregon corridor.
The Oregon State Parks page lists current alerts, which helps you pivot plans if maintenance or high surf restricts access.
If you need a nearby landmark, Haystack Rock at 1480 S Hemlock St, Cannon Beach, OR 97110, offers a recognizable point of reference.
Cannon Beach has several visitor friendly stops, including the public lot at 2nd St and Spruce St near 207 N Spruce St, Cannon Beach, OR 97110.
Carry layers, a rain shell, and warm gloves because wind chill on wet sand can sap energy faster than expected.
Stow a compact first aid kit and a headlamp in your pack so you can troubleshoot minor issues on the beach.
Plan your exit before blue hour, and leave extra time if the tide is turning and waves are climbing higher.
Respect neighboring properties and signed boundaries as you walk the beach toward the caves and waterfall.
Fuel up before you arrive so you can linger when the light gets good and the reflections finally peak.
A calm, prepared approach lets you enjoy the scenery while keeping your focus squarely on creative work.
Suggested photo angles and simple gear list
Build a short shot list that starts with a low reflection panorama, moves to a cave frame, and ends at the waterfall.
Begin near the access path and scout the cove curve, then slide toward the headland as the tide continues to fall.
Choose a sturdy travel tripod, a wide zoom, a tele zoom, spare batteries, a polarizer, and a set of microfiber cloths.
Add a compact headlamp, weather sealed bags, and a lightweight shell that handles Oregon sprinkles and ocean spray.
Angle one composition from knee height to pull a mirror line across the frame and double the warm cliff color.
Reframe at the cave mouth and use the dark interior as a natural border that pushes attention to the surf.
Slide to the waterfall when the tide sits lowest, then vary shutter speed to compare silky flow with crisp droplets.
Pack simple spikes or sand feet if your tripod tends to sink when waves loosen the surface under load.
Keep a cloth wrapped around the camera between sets to cut down on salt flecks that blur fine detail.
Use a lens hood on every shot because glare control saves contrast when light sweeps across wet stone.
Practice quick manual focus changes to stay sharp while surf patterns shift the eye line every few seconds.
Pocket a small blower for grit, since clearing dust off the sensor can wait for a cleaner indoor space.
Repeat your circuit once more at blue hour to capture the cooling palette as reflections turn gentler.
A tight, thoughtful kit frees your attention so composition and timing take the lead all session long.
Dear Reader: This page may contain affiliate links which may earn a commission if you click through and make a purchase. Our independent journalism is not influenced by any advertiser or commercial initiative unless it is clearly marked as sponsored content. As travel products change, please be sure to reconfirm all details and stay up to date with current events to ensure a safe and successful trip.